How To Build Stocks

by

Jack


There are dozens of different ways to build a set of stocks. I went the traditional route.


Mine came out pretty good, so I thought I'd share the plans with you. This is by no means the ONLY way to do it, but maybe it will give you some ideas.

A few power tools and a bit of carpentry skill are useful. If you are a complete klutz, be careful. Don't hurt yourself. Ask that hunky neighbor of yours to bring his tools over some Saturday afternoon and help you. A six-pack and a pizza should do the trick.


Cut List:

4 - 4"x4" studs cut to 15" lengths
2 - 2"x4" studs cut to 36" lengths
2 - 2"x4" studs cut to 17" lengths
1 - 3/4" birch plywood cut to 20"x36"
4 - 2"x10" studs (planks) cut to 34"
(I then "customized" the cut by slicing them to: 2 pieces down to 6" widths, and 2 pieces down to 7-1/2". This was so the feet would be more "centered" between the boards. You can have the lumber yard do the slicing for you.)
2 - 1"x4" cut to 6" lengths
2 - 1"x4" cut to 7-1/2" lengths

Hardware List:

8 - 1/4"x5" stove bolts
8 - 1/4"x4" stove bolts
8 - 1/4"x2" stove bolts
Washers and 1/4" hex nuts
4" wood screws
4 - 6" corner irons
4 - 2" corner irons
3-1/2" butt hinge
3-1/2" safety hasp and padlock

Useful Tools:

Electric dill with long 1/4" wood bit
Power screwdriver
Electric jigsaw

Miscellaneous:

Foam rubber
Black gaffers tape or small pieces of black leather

Optional:

2 - large screw eyes with 1/4" "eyes"
26" length of 1/4" wooden dowel


Build the Platform


I started out by building a very sturdy platform, which stands 16" high and 20" by 36" wide and long.


You can do this by framing the 4 pieces of 2"x4", fastening them together with wood glue and screws. Then, glue and screw the plywood on top of the 2'x4" frame.

Next, leg up the platform. Turn it upside down and place a 4"x4" in each inside corner.


Drill two holes all the way through both the side pieces of 2"x4" and the 4"x4" (either a long bit is required, or start the hole into the 4"x4", remove it, and finish it up.) Secure each leg with two stove bolts, washers and hex nuts. I used a 1/2" bit to "sink" the heads of the stove bolts into the 2"x4"'s. Otherwise, you will need at least 6" or 7" stove bolts.

Now you have a small, sturdy platform. Because I thought I might also want this to double as a small bondage bench, I used a 1/2" wood bore bit to drill some additional holes through the sides of the 2'x4"'s, to accept ropes for bondage purposes. This is totally optional.

Construct the Stocks

This is the trickiest part, but it is also fun. My secret is to use TWO pieces of planks, screwed together as one, for both the top half and the bottom half. This makes them heavier, sturdier, and more secure around the ankles of your victim.
Once you have the boards at the widths you desire, temporarily screw the twin pieces together and begin to sketch out the ankle holes you will be cutting.
I studied my ankles, and took some measurements. I noticed that with the ankle bones protruding, and that bone on the bottom of the foot, they are most certainly not "round". So, I fashioned the holes to somewhat mirror the shape of a guy's ankle. Also, for the "inside" board, or the one that would be closest to the victim's shins, I made that side of the holes narrower than the ankle-side. I did this by sketching out the approximate size of the half-circles, separating the two boards, and setting the jigsaw blade to make a bevel cut.
At first I erred on the side of caution, making the holes quite small. You can always enlarge them, but you can't make them smaller! After a few trials and errors, I got them just about right. (After the stocks were in use for a bit, and I got several complaints about ankle bones being squashed, I went back and widened the holes a little more.) Also, allow extra room for the padding that you will apply to the insides of the holes.


You might be able to see in the picture that the holes are not quite round, but sorta follow the shape of a guy's ankles. I like a nice snug fit, but not painfully tight.


Pad The Ankle Holes

This is an important step, and may also take some trial and error. Experiment with what you think might work best for you. I settled on four small pieces of foam rubber, cut to fit into each half circle, glued in, and covered with strips of black gaffers tape.


I eventually want to get some pieces of black leather and some silver-headed thumbtacks, and do them up real nicely.


Assemble The Stocks

Once I was satisfied with the holes, I screwed the two halves of both the top and the bottom pieces together with long wood screws. I did not glue them together, in case I ever want to take them apart again for further adjustments.


Next, I screwed the four pieces of 1"x4"'s to the edges of the double-width planks.

On one side,
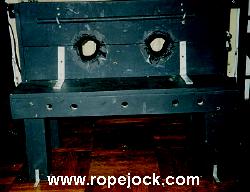
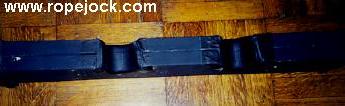
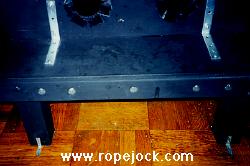
I attached the hinge,
<-


and on the other side,
the hasp lock.
->


Mount the Stocks to the Platform

Using the four 6" corner braces, mount the stock unit to the platform. Set the braces where you want them, making sure that they don't interfere with the ankle holes. Use two on each side. They basically only support the bottom half of the stocks, but because of the thickness of the wood, and if you have used a good, strong hinge, once the top is locked in place, you will be surprised at how sturdy the whole thing is.
After aligning the corner braces, I drilled holes for the stove bolts through the stocks and the top of the platform, then used the bolts, washers and nuts to fasten them in place.
The cool thing about using the bolts is that you can break these down in about five minutes, even removing the legs from the platform, and the whole unit can easily be stored in a closet.
Then, just slap on a coat of black paint or stain or whatever you want.


Secure The Unit to the Floor

Finally, even though it is a heavy and very sturdy unit, you will still want to anchor it to the floor somehow, so that the victim, in wild spasms of laughing and thrashing around, cannot move the unit.
I screwed a 2" corner brace to the outside of each platform leg. I am lucky enough to have old hardwood floors that I can sink small screws into. I merely place the unit where I want it, and use my Makita to screw it down to the floor. It becomes rock-solid, and it's impossible for even the strongest jock to budge it.

If you do not have the type of floor that you can screw into, be resourceful. Perhaps get a large piece of plywood that you can set down first, and then screw the unit into that. Or, come up with any number of other ways to secure it.


Tying Back the Toes

This is an optional, but to me, a necessary adjunct to the stocks. I came up with three ways to do it; you can probably come up with many more, if you want to.

First, I took two large screw eyes with 1/4" "eyes", and made several holes for them, just above and to the outside of each ankle hole. This is so that they can be moved to accommodate any size foot.

Then I merely take some rope or rawhide strips and tie the big toes to the screw eyes. You can tie them tightly or loosely, depending upon how much movement you want to give him.

Second method, with the large screw eyes aligned, I slide a 1/4" wooden dowel through the eyes and twist them slightly to hold the dowel in place. I now have a "bar" that extends behind the guy's toes and is slightly away from the face of the stocks. I can come up with all sorts of intense ways to tie the toes back to this "bar".

Third method, I took a thin strip of wood and hammered ten small nails halfway into it.
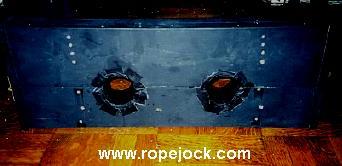
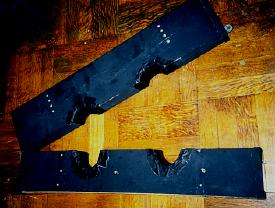
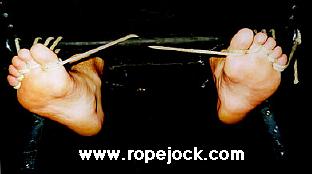
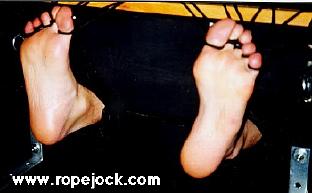
By screwing the strip of wood to the top edge of the stocks, I now have ten separate nail heads to stretch and tie the toes up and back to.


And There You Go.

I hope that by seeing how I built mine, you might get a few ideas about building your own.

Good luck!


Jack


Other stories by the same author:


www.ropejock.com